

Countryside Cycling Tours for Adults
A practical guide to cycling meetups in Portugal. Includes route difficulty levels, what to bring, and how to find groups in your region.
Read GuideEverything you need to know about joining your first mosaic class. We’ll walk you through what to expect, what you’ll learn, and how to find workshops near you.
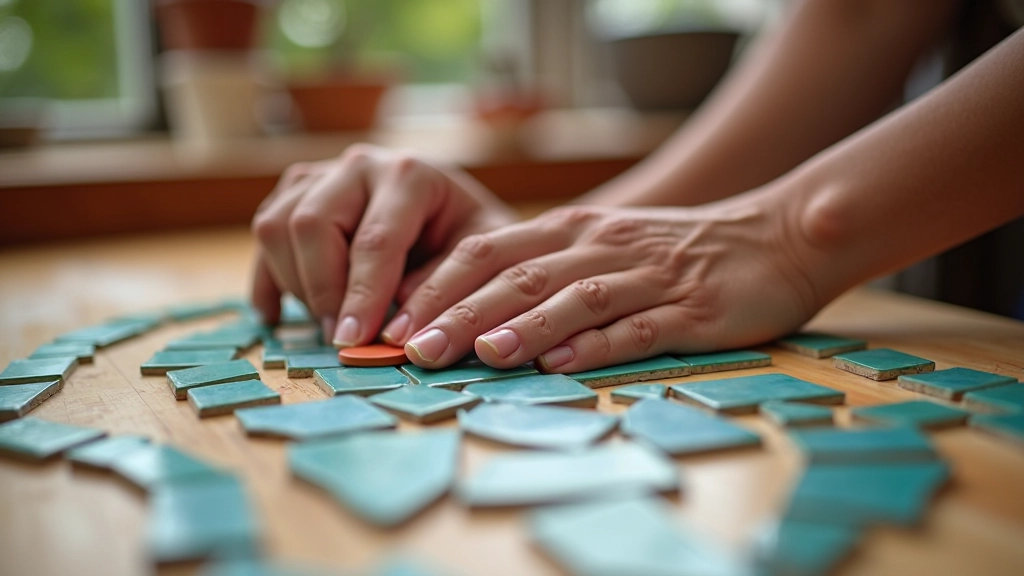
Mosaic art isn’t just about arranging tiles. It’s a meditation in motion, a way to create something beautiful with your hands while meeting people who share your creative interests. Whether you’re 45 or 65, whether you’ve never picked up a paintbrush, this is genuinely accessible.
The beauty of mosaic work is that there’s no “right way” to be bad at it. You’re breaking things into pieces anyway. That’s the whole point. Plus, you’ll walk out with something tangible you made yourself—not a certificate, not a skill badge on your phone, but an actual mosaic that’ll hang on your wall or sit on your shelf.
Work alongside people your age who love creative pursuits
No experience needed—just show up and start creating
Leave with finished pieces you’ll treasure for years
Most workshops run 2-3 hours. Here’s the typical flow
You’ll arrive, get a workspace, and meet the instructor and other students. They’ll explain the basic technique—how to hold the tools, which way to cut tiles, how adhesive works. Most instructors spend about 15-20 minutes on this, showing you how to score ceramic or glass tiles so they break where you want them to.
You’ll either pick a template from what the workshop offers or sketch something simple yourself. Most beginners work with basic patterns—geometric shapes, simple animals, abstract designs. The complexity is totally up to you. It’s not about artistic skill, it’s about enjoying the process.
This is where you spend most of your time—cutting tiles to size using a wheeled glass cutter or mosaic nippers, then arranging them on your base. You’re building muscle memory here, learning the feel of the tools, discovering which colors work together. It’s meditative work.
You’ll apply adhesive (usually white glue or thin-set mortar) to your base, press the tiles into place, and let it dry. In some workshops, they’ll do the grouting step in a follow-up session so everything sets properly. Grouting fills the gaps between tiles with colored cement, finishing your piece.
Most workshops provide everything you need. You’re not buying supplies upfront—it’s included in the class fee. Here’s what you’ll actually work with:
Small handheld pliers designed for cutting ceramic or glass tiles. They’re not intimidating—it takes about 30 seconds to get the hang of them. You’ll feel like a pro after your first piece.
Workshops stock colorful ceramic tiles, glass pieces, and sometimes vitreous glass. You choose what colors speak to you. It’s genuinely fun—like being a kid in a candy shop, but everything’s sharp and beautiful.
Could be plywood, ceramic tile, wood coasters, or terracotta. Size varies—small projects (4″x4″) are perfect for beginners. Larger pieces are for those who want a challenge.
White craft glue, thin-set mortar, or epoxy to stick tiles down. Grout (colored cement) fills spaces between tiles. Instructors handle the technical mix—you just apply.
It sounds simple, but you’re building genuine techniques that transfer to other creative work.
Most students don’t realize they’re learning until they compare their first piece to their third. The improvement’s obvious—steadier cuts, better color choices, more ambitious designs. That feeling of tangible progress? It’s addictive.
Portugal’s hobby community is thriving. Here’s where to look
Here’s what’s actually true about beginner mosaic work—no hype, just honest talk.
And that’s completely fine. You’ll look at it in a month and see all the mistakes. But you’ll also see what you learned. That’s the whole point. Most people frame their first pieces anyway—it’s proof of the journey, not a statement of mastery.
Real progress shows up around week 4-5. Your cuts get cleaner, your designs more ambitious, your color choices more confident. But that first session? You’re learning. Accept it and enjoy the process instead of comparing yourself to students who’ve been doing this for two years.
Gripping nippers for 2-3 hours is a workout for hands that aren’t used to it. Bring a hand cream and don’t be shocked if you’re sore the next day. It passes by session two or three. Your hands adapt faster than you’d think.
You’re working quietly on your own project, but you’re also chatting with people around you. Questions get asked, experiences get shared, friendships form. Some people come for the art. Many come back for the community. Both reasons are valid.
Everything you need before walking into that first class
Find 2-3 options in your area, check their schedules, read reviews if available, and look at instructor credentials. Most workshops offer drop-in classes or beginner-focused sessions on weekends.
Ask about what’s included, whether supplies are provided, if they have beginner-specific sessions, and what time to arrive. Don’t assume anything—instructors appreciate the questions.
You’ll get dust and glue on yourself. Wear something you don’t mind getting dirty. Closed-toe shoes are essential—tiny tile shards on the floor are real.
Workshops can run 2-3 hours. You’ll want water nearby. Some studios provide it, some don’t. Bring a small snack too—you’ll be focused and engaged, and fuel matters.
You’re there to learn and create, not to produce a masterpiece. Let yourself be a beginner. It’s liberating once you accept it. Some of the best mosaic pieces come from people who stopped trying to be perfect.
“I walked in nervous, thinking I’d break everything. Four hours later I’d created something I’m actually proud of. Went back the next week and brought my friend.”
— Marta, first workshop attendee
You’ve got all the information you need. Mosaic workshops aren’t intimidating once you know what to expect. They’re accessible, genuinely fun, and filled with people who get excited about creating something with their hands.
The hardest part is just showing up. Everything else—the techniques, the confidence, the community—builds from there. Find a workshop in your area, send that email, and book your first session. Your wall’s waiting for its first piece.
Explore other hobby guides to round out your creative life, or jump into that first mosaic class you’ve been thinking about.
Explore More Hobbies

This guide is informational and educational in nature. Information about workshops, techniques, and availability is accurate as of March 2026 but may vary by location. Always contact your local workshops directly to confirm current schedules, pricing, and what’s included in sessions. Individual experiences in mosaic classes will differ based on instructor style, your prior experience, and personal learning pace. This content is meant to introduce you to mosaic art workshops—not replace direct conversation with instructors or experienced practitioners. Safety precautions and material handling vary by studio; follow all guidance provided by your workshop instructor.